Print Production & Setup
November 2, 2026
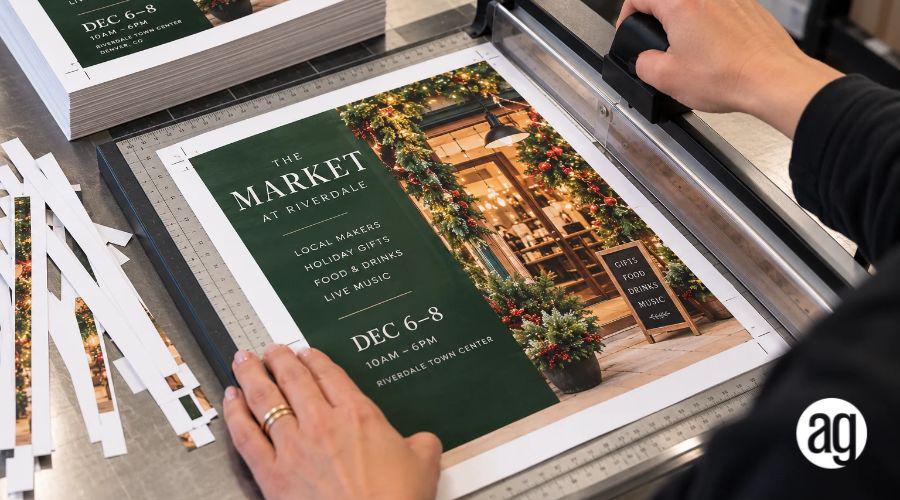
In printing, bleed is the extra artwork that extends beyond the final trim size of a printed piece. The project is printed slightly larger than its finished dimensions and then trimmed to size. That extra artwork helps colors, photos and background graphics reach the finished edge without leaving an unintended white border.
For most commercial print projects, 1/8 inch (0.125 inches) of bleed on each side is a common standard. Large-format graphics and other products may require different specifications, so always confirm the requirements for the specific project before exporting the final file.
Even with accurate commercial printing and finishing equipment, small variations can occur during trimming. If background artwork stops exactly at the trim line, a slight shift can leave a thin white edge on the finished piece. Extending the artwork into the bleed area gives the trimming process extra image or color to work with.
Bleed does not change the finished size of the piece. It exists outside the final trim and is removed during finishing.
Use bleed whenever a color, photo, texture or graphic is intended to run all the way to the finished edge of the printed piece. Common examples include business cards, brochures, postcards, invitations, menus, flyers and booklets.
Bleed may not be necessary when:
The design intentionally includes a white margin around the edge.
All artwork stays comfortably inside the page.
The piece is a simple text document with no edge-to-edge artwork.
For most commercial print projects, a standard bleed of 1/8 inch (0.125 inches) on each side is recommended. That means the artwork extends 0.125 inches beyond every finished edge that is intended to print edge to edge.
For example, if a finished piece is 5 × 7 inches and requires 1/8-inch bleed on all four sides, the artwork extends to 5.25 × 7.25 inches overall. The final piece is still trimmed to 5 × 7 inches.
Large-format graphics and specialized products may use different specifications. Confirm the required bleed before building or exporting the file rather than assuming the same measurement applies to every print product.
Bleed, trim and safe area describe three different zones in a print layout. Understanding all three is important because bleed protects edge-to-edge artwork, while the safe area protects the content that should never be cut.
| Term | What it means | What belongs there |
| Bleed | Extra artwork extending beyond the finished size. | Background colors, photos and nonessential graphics that should reach the edge. |
| Trim line | Where the printed piece is cut to its final dimensions. | The boundary of the finished piece. |
| Safe area | The area inside the trim where important content should remain. | Logos, headlines, phone numbers, dates, QR codes and other critical information. |
As a general guide, keep important content at least 1/8 inch inside the finished edge unless the specifications for the project call for a different safe area.
Crop marks, sometimes called trim marks, are small lines that indicate where the finished piece should be cut. They are different from bleed: bleed is extra artwork outside the trim, while crop marks identify the trim location.
Do not automatically add crop marks to every file. Requirements vary by production workflow, so include them only when the project specifications request them.
Most bleed problems come from confusing the bleed setting with the artwork itself. Adding a bleed value to a document does not automatically extend a photo or background into that area.
Adding bleed settings but leaving the bleed area empty. Edge-to-edge artwork must physically extend into the bleed.
Putting text or logos into the bleed. Important content should stay inside the safe area, not extend beyond the trim.
Building the document at the wrong size. Start with the finished trim size, then add bleed around it.
Adding crop marks automatically. Some production workflows do not need customer-supplied crop marks.
Checking only the editable design file. Review the exported PDF before submitting it.
The exact steps depend on the design program. In Adobe Illustrator, bleed can be defined when creating a document or added later through Document Setup. In Canva, the editor uses a print-bleed guide that can be displayed while designing.
Rather than duplicating a full software walkthrough here, use A Guide to Creating Print-Ready Artwork for application-specific instructions on preparing and exporting files in Adobe InDesign, Illustrator, Photoshop and Canva.
The guide goes beyond bleed to cover finished size, image resolution, color setup, fonts and artwork, safe area, and PDF export across Adobe and Canva workflows.
Before submitting the file, open the final exported PDF and check the file itself—not only the working document.
The finished page size matches the ordered product.
Every background, image or graphic that should reach the edge extends fully into the bleed.
Important text, logos, dates and QR codes remain inside the safe area.
Crop marks are included only when required.
Every page of a multi-page document has been reviewed.
Bleed is only one part of a print-ready file. Image resolution, color setup, fonts, links and PDF export settings can also affect production.
What does bleed mean in printing?
Bleed is artwork that extends beyond the final trim size. The extra area is trimmed away after printing and helps edge-to-edge colors, photos and graphics reach the finished edge cleanly.
Is 1/8 inch the standard bleed?
For most commercial print projects, 1/8 inch (0.125 inches) on each side is a common standard. Some products, especially large-format graphics, may require different specifications.
Does bleed make the finished piece larger?
No. Bleed extends beyond the finished dimensions during production, but the piece is trimmed back to its intended final size.
Do all print files need bleed?
No. Bleed is generally needed when artwork is intended to reach the finished edge. A design with intentional white margins or artwork that stays well inside the page may not require it.
Should text go into the bleed area?
No. Keep text, logos, QR codes and other important information inside the safe area. The bleed is for background artwork and other elements intended to run off the edge.
Are crop marks the same as bleed?
No. Crop marks indicate where the piece should be trimmed. Bleed is the extra artwork extending beyond that trim line.