Crops and bleeds made simple
As printers, one critical component of how we handle your files is determined by if your document has bleeds or no bleeds. Delays and confusion during the printing process are often caused by questions of if files should be printed with full bleeds and how to properly set them up when needed. In this blog post, we will clear up some of the “bleeds or no bleeds” confusion, and instruct you on what you need to do to set up your document with bleeds and crop marks. Of course if you need help, our professional graphic designers are always available to help. Depending on the file type and situation, there may be a charge involved, but getting it done right the first time can be invaluable when it comes to printing expenditures and deadlines.
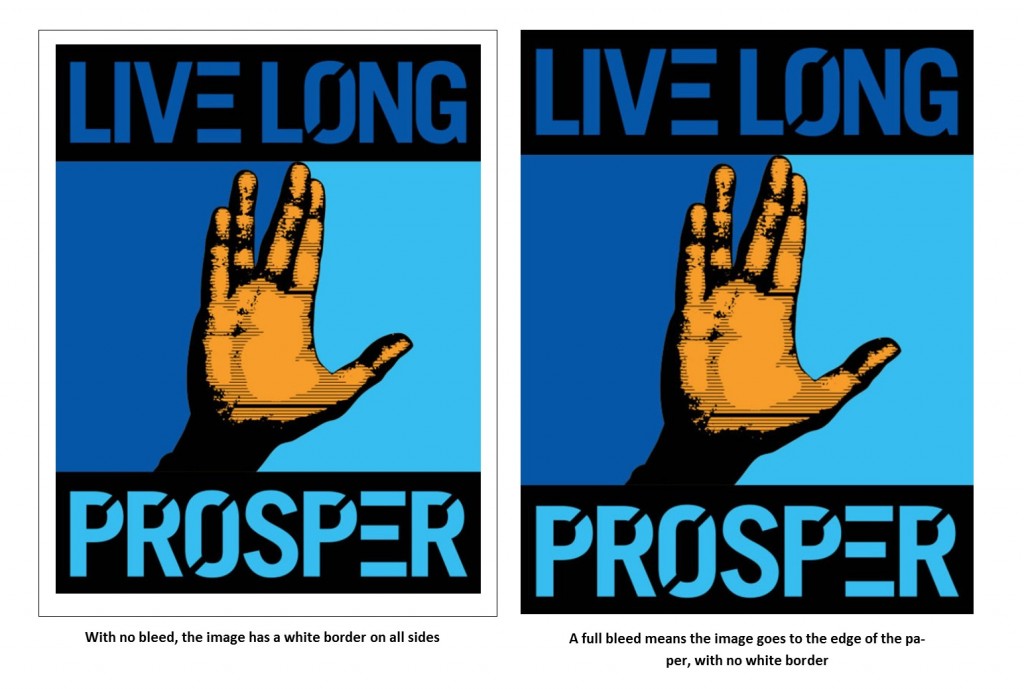
Your first question may be, what exactly is a bleed? A document with a bleed has print that goes all the way to edge of the paper. Below is a sample of the same document, one with no bleed and one full bleed.
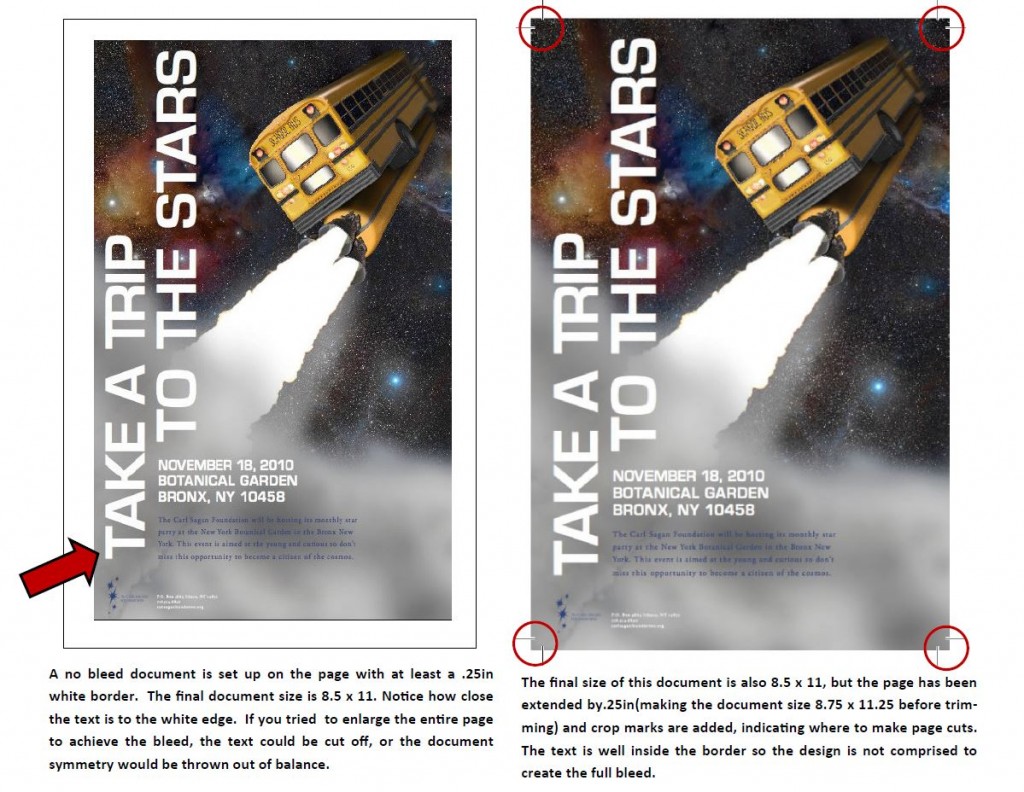
In digital printing, a full bleed is achieved by extending the background of the image by at least ¼ inch, adding crop marks, and cutting the document to the desired finished size.
Full-bleed documents make an impressive statement of quality and transcend the feeling of digital prints by eliminating white space. This allows you to take advantage of the convenience and quick turn-around of print-on-demand, while creating documents that feel like they were produced off-set.
Setting up your document to print with bleeds is pretty simple with a few tips:
- Add bleeds and crop marks in your design program;
- Make sure text and important content have a safe margin from the edge of the paper, at least ¼ inch;
- Add bleeds by adding 1/8 inch from the edge of the paper on each side. This will make an 8.5 x 11 sheet 8.75 x 11.25;
- Export to PDF at the highest DPI (preferably 300 dpi);
- You now have a print-ready document ready to go into proofing and production!
If you are not sure about how to add bleeds to your document,
you can Google instructions for most software applications. These days, most software manufacturers makes it much easy to create a full bleeds and crops, and have posted easy to follow instructions on the web. Search for your application and version to get the exact instructions.
For example, Illustrator has simple instructions at this URL:
http://help.adobe.com/en_US/illustrator/cs/using/WS714a382cdf7d304e7e07d0100196cbc5f-64b4a.html
Adobe Acrobat has posted these easy to follow instructions:
http://help.adobe.com/en_US/acrobat/X/pro/using/WS58a04a822e3e50102bd615109794195ff-7bc5.w.html
If you are working with a professional designer, let them know you will be printing full bleed so they can set up the file appropriately from the beginning as adding this at the end can lead to extra design time and expense.
Of course if you need help, our professional graphic designers are always available to help. Depending on the file type and situation, there may be a charge involved, but getting it done right the first time can be invaluable when it comes to printing expenditures and deadlines.